


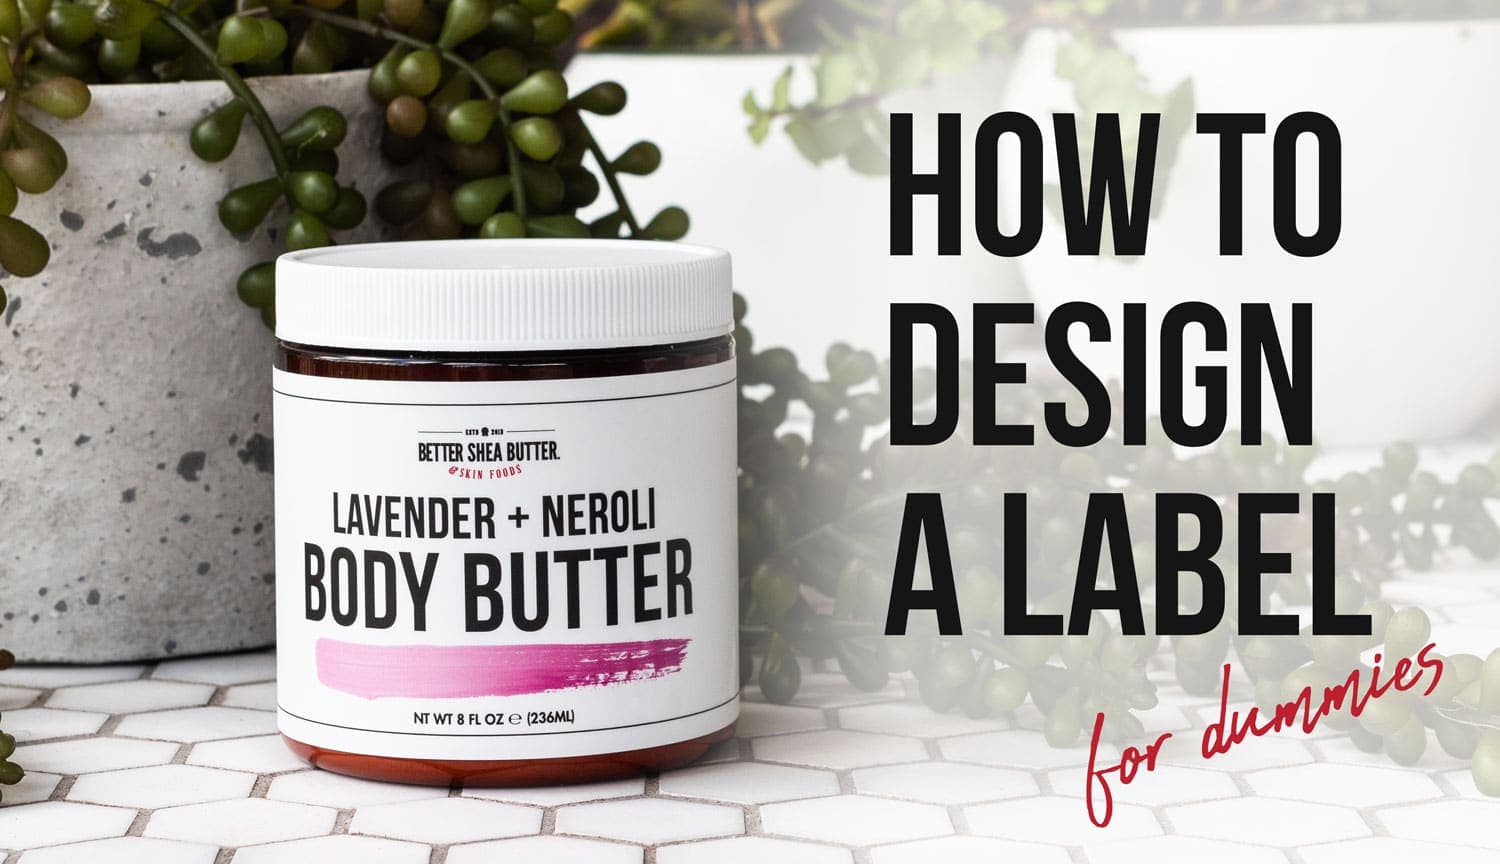
You have a business name, a logo, all your products figured out, decided on your jars/containers, and now it’s time to figure out a label.
The label is potentially one of the first things from your business that a customer will see and provides pretty much all the information about the product that a consumer would need. It should clearly relay the purpose of the product at a glance as well as provide other important information, including the product name/identity, weight, ingredients, any needed warning statements, and name and place of business.
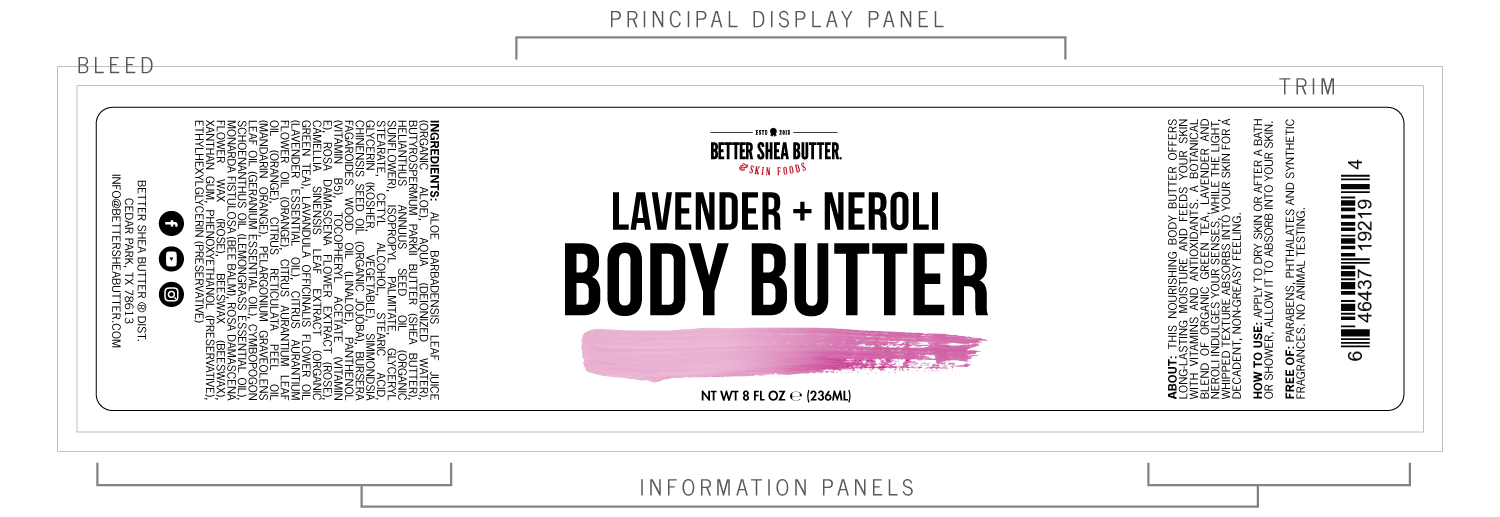
For cosmetic & skin care products, the FDA regulates what is required for the labels which are:
On the main portion of the label (Principal Display Panel), you’ll need:
- Product name/identity
- Weight/quantity (in metric)
- §740.10 Warnings (if the product contains any ingredient that the safety of hasn’t been fully determined)
On the other parts of the label, the information panel(s) you’ll need to include are:
- Name & place of business
- Distributor statement (if different from the manufacturer)
- Warning & caution statements
- Material Facts – example: directions for safe use
- Ingredients: Listed in common terms as well as the INCI names, all listed in descending order of predominance
Note: If planning to sell in stores or on Amazon, you will be required to have a barcode
You’ve got all the above information gathered for your product(s) and you’ve got your containers figured out. You’ll want to measure the portion of your jars/containers that you want the label(s) to cover so you can figure out a supplier of labels.
There are multiple options for producing labels:
All-In-One Suppliers: There are suppliers that can provide the packaging/containers and print on them directly. This tends to be pricier and not feasible for smaller or newer businesses but can reduce labor costs.
Label Suppliers: You can find a supplier that will print labels for you and you just apply them to your products, usually fairly affordable, especially if you are making larger batches of products.
Print Your Own: You can order sheets of sticky labels that you can print on your own at home, typically the cheaper option with the lowest upfront costs if you already have a printer and are doing a relatively simple label and smaller batches of products.
DIY: You can handle the entire process, start to finish, all by yourself if you have the right tools. This method is more time intensive and only recommended if you already have most of the equipment and have the spare time. This method does allow for greater customization.
No matter which of the above options you choose, you’ll want to know before your start laying out the assets (or having your designer do it) the exact print specs and/or templates for the labels you will be making or having made.
As far as software goes, you can use either Vector or Raster based software, but I recommend sticking with vector and just bringing in any raster based graphics/images as needed. See my other blog post about logo design for a more in depth look at Raster vs Vector and for a list of recommended vector software there. If you’re already comfortable using a raster based software, feel free to use it, and if you’re looking for suggestions, I recommend any of the following:
Adobe Photoshop: Expensive, steep learning curve, and the industry standard, powerful
GIMP: Completely free, steep learning curve, powerful
Canva: Affordable, user friendly, good for beginners
Now for some quick technical specs, in case you’re designing the labels yourself. You’ll want your label to be in the CMYK colorspace, not RGB (if you’re having your labels produced by the All-In-One method, they will let you know their recommended colorspace and file requirements) and make sure you are working at 300DPI, which is appropriate for print. You will also want to extend any background colors or design elements to the bleed line, which will print outside of the final label dimensions but will prevent any cutoff designs or weird white borders that aren’t intentional. Along similar lines, you’ll want to keep all important text and information at least ¼” from the trimmed edge of the label to prevent any of it from accidentally being trimmed off in case of a misalignment. Typically, if you’re working from a template, it will have the bleed/trim lines indicated and already in the correct colorspace, but it never hurts to make sure. If you’re printing with a company, they’ll most likely let you know what file types as deliverables they prefer, although most companies will accept PDFs, as long as they fit the DPI & color requirements.
Now to expound a bit further on the Print-Your-Own & DIY methods.
With Print-Your-Own, one of the recommended websites for buying sheets of blank labels is Avery. They provide you the templates so you can just import it into your software of choice, design your label and print. This method can be a bit frustrating because not all printers are created equally, some grab the paper perfect every single time, others… do not. This can cause headaches, especially if you’re a perfectionist, and let’s face it, you want your products to look their best. You might end up finding out that you need to shift your design(s) around on the page to find the sweet spot for your printer or you might just have the perfect printer that prints exactly as it should, in which case, YAY! Typically though, this method will take a few tries to get it right, so make sure you buy more blank labels than you need and, depending on your label design, have extra ink on hand. One way to avoid annoyance with this method is to avoid any printed borders or elements that are meant to be an even distance from the label edge, as this will definitely draw attention to things being off-center.
For the DIY method, if you have a printer, a Cricut, and sticker paper, you can fully design, print and cut out the labels yourself. This is definitely a more labor intensive way of creating labels, but you shouldn’t have the alignment issues that you can get with the Print-Your-Own method and you can do fun/different label shapes or exact sizes without having to pay a company to do it custom. There are also loads of different sticker paper brands and types out there, so this could take some trial and error to see what would work best for you and your products. I don’t recommend this method if you’re going to be producing a bunch of labels in a small amount of time, but it definitely should be considered for smaller batches of products.
This blog post wasn’t a step by step process and doesn’t contain every bit of the technical information you need, but hopefully this has helped you find a good starting point for your journey into label design and creation.